A Call Routing Plan is used to provide the call processing rules
Processing starts at line 1 and continues sequentially.
In this example we are going to build a plan that will dial one or more selected destinations similtaneously when an incoming call is received.
In the Plan (red) section click 'New' and enter a plan name.
.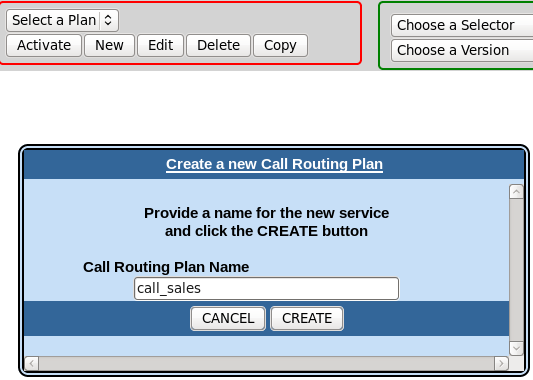
Click 'Create' to create the plan.
Next: create the selector(s) by clicking 'New' in the Selector (green) area.
(so-called because they are used to select a routing option from one or more options)
Type a name for the selector and choose a selector type from the drop-down.
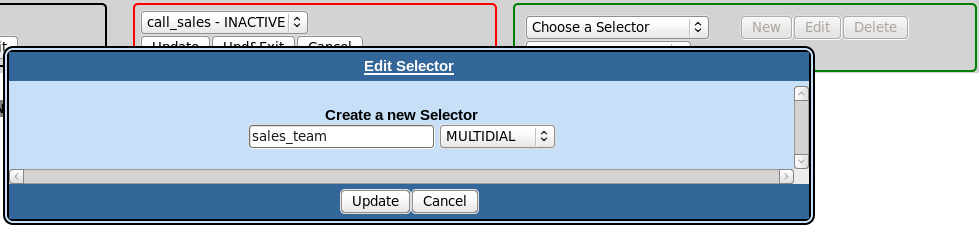
Click 'Update' to create the selector.
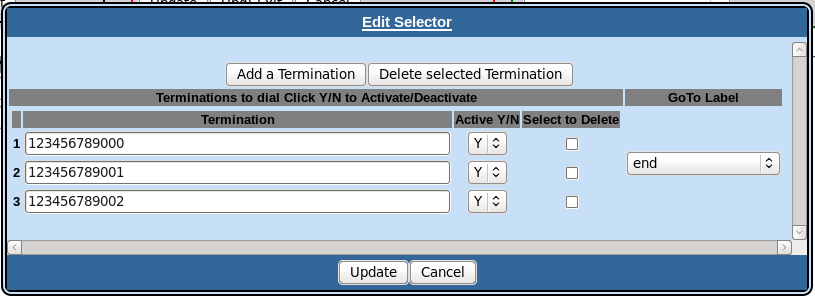
To build the selector click 'Edit'
and click the 'Add a Termination' button to add addtional termination lines:
Type termination numbers (starting with the country code) or a SIP URI of the form joe@widgetco.com.
Select from the drop-down(s) whether the termination(s) should be Active (i.e. should be dialled)
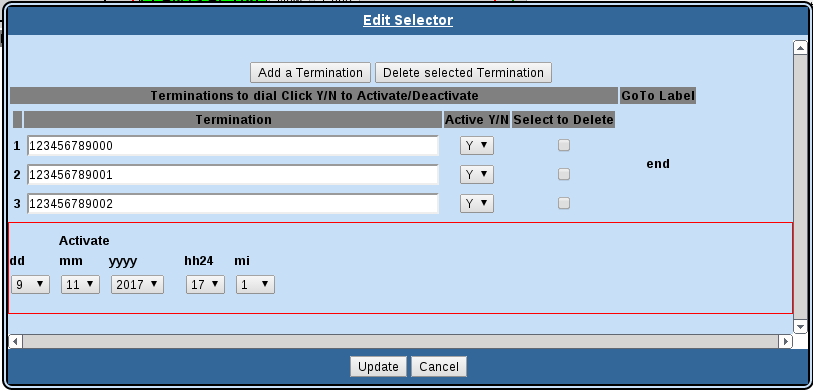
Click 'Update' to save the selector.
The newly created selector is available now for use in a Call Routing Plan.
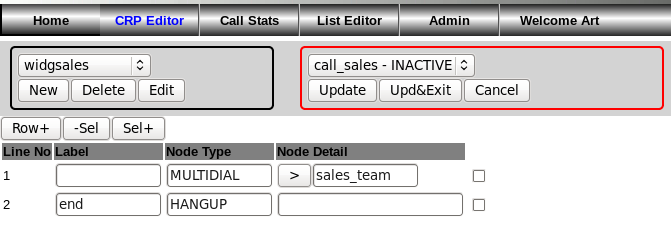
The next step is to build the plan:
Select the plan from the drop-down and click 'Edit'
Click 'Row+' twice to insert two rows; line 1 for the multidial selector, and a final line for a HANGUP action
In line 1,
- double-click the Node Type box and choose MULTIDIAL from the drop-down;
- In the Node Detail box select the MULTIDIAL selector from the drop-down list.
in line 2
- type in a line name (something meaningful) in the label box
- double-click the Node Type box and select 'HANGUP' from the drop-down
Click the 'Update' button to save the changes.
Click the > button in Node Detail to display the selector.
Edit the selector by clicking the 'Edit' button and set the GoTo label from the drop-down.
By saving the Call Routing Plan as you edit it, the Plan labels are made available to the selector GoTo Label drop-down.
Save the selector by clicking 'Update.
Exit and Save the Call Routing Plan editor by clicking Upd&Exit.